
How to create a new store
- What is a store?
- Creating a store
- Disabling your store until it's ready
- Editing basic settings
- Connecting your store to Zazzle
- Verifying ownership of your Zazzle store
- Adding images
- Mopping up
What is a store?
So you've created your user account and set up your design agency. You're ready to create one or more stores.
If you are used to Zazzle then you probably already understand how you can have one member account with more than one store. This lets you separate your many products into well-defined brands that serve your different customers.
This site follows that same model. Except you also have the added notion of an "agency", allowing multiple people to work together without having to share a login password.
Creating a store
There are a few ways to do so. But probably the best way is from your "My account" page. You'll see all the agencies you're part of listed. Odds are good there's only one for you. Look for the "New store" button under your agency's heading. Click that.
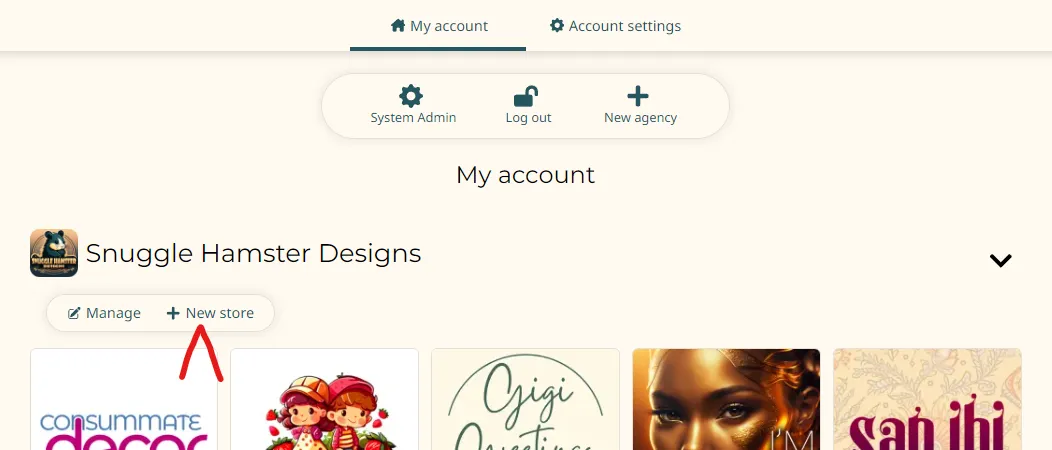
Enter your store's name. It will suggest a "code" based on it for you. You can change it. This mnemonic code will be used in the URL for your store. You will be able to change both of these at any time in the future.

Click "Save".
Disabling your store until it's ready
I recommend you start by disabling your store. Click the "Disable" button on the toolbar. You'll see a friendly note reminding you to enable it later. When your store is ready to go live, just come back here and click "Enable".
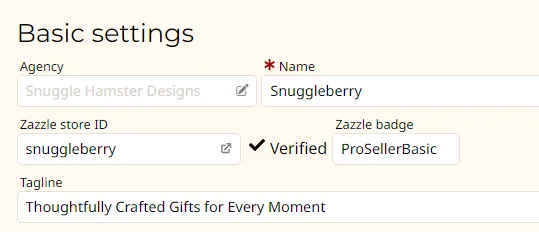
Editing basic settings
Go ahead and edit your store's tagline, description, and other basic settings. They will not be automatically imported for you.
Connecting your store to Zazzle
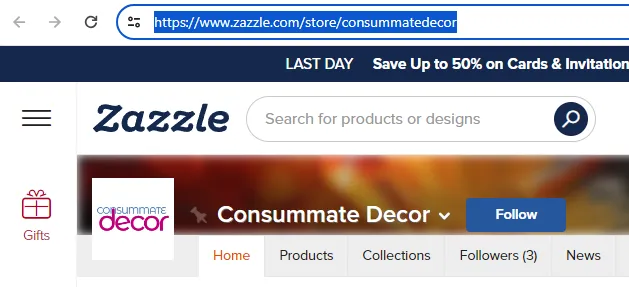
Technically you don't have to have your store on Zazzle too. But there's not much point right now to doing this. So you're going to need to get your store's ID from Zazzle.
Easiest way to do this is to open a new tab and go to your Zazzle store's home page. Then copy the URL from the address line:
Then come back to your store's edit page and paste the whole URL into this text box. When you click or tab away it will strip away the parts of the URL it does not need:
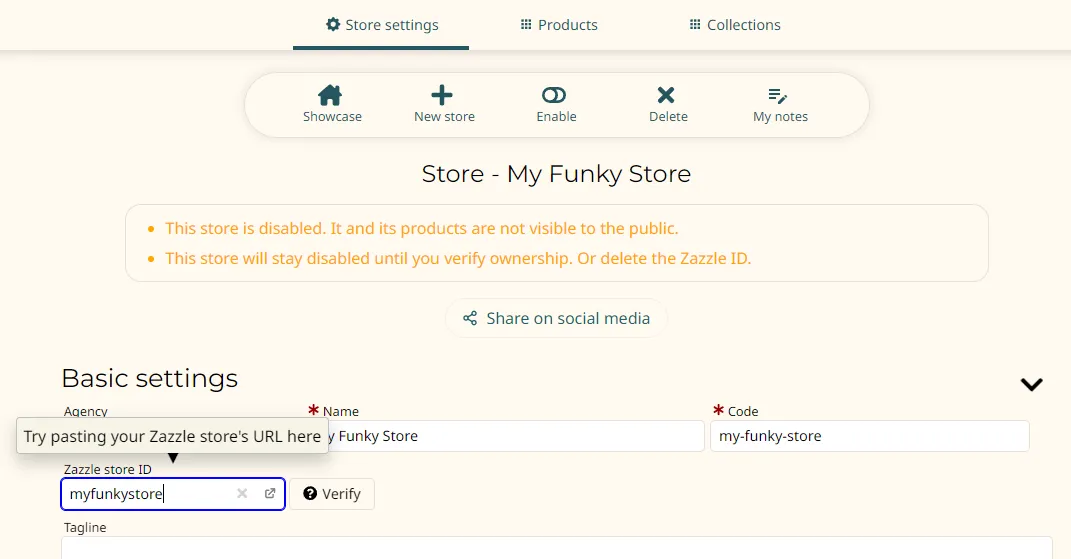
Click the "Save" button. Now you're ready to verify.
Verifying ownership of your Zazzle store
Now you need to verify your store. We need to know that you actually own your Zazzle store. This is to prevent unauthorized people from pretending to be you and easily importing your inventory and other public data. You prove your ownership by editing something in your store that we can see.
Click the "Verify" button. You should see a popup like this:
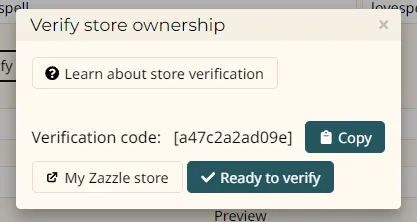
Click here to read more about the verification process.
Once you are done your product editor page should look something like this around the Zazzle store ID:
Adding images
One final thing you'll want to do is polish your store's branding with 3 essential images:
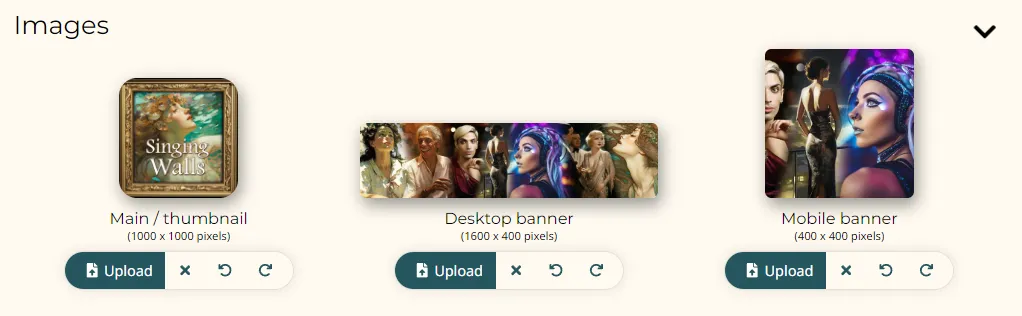
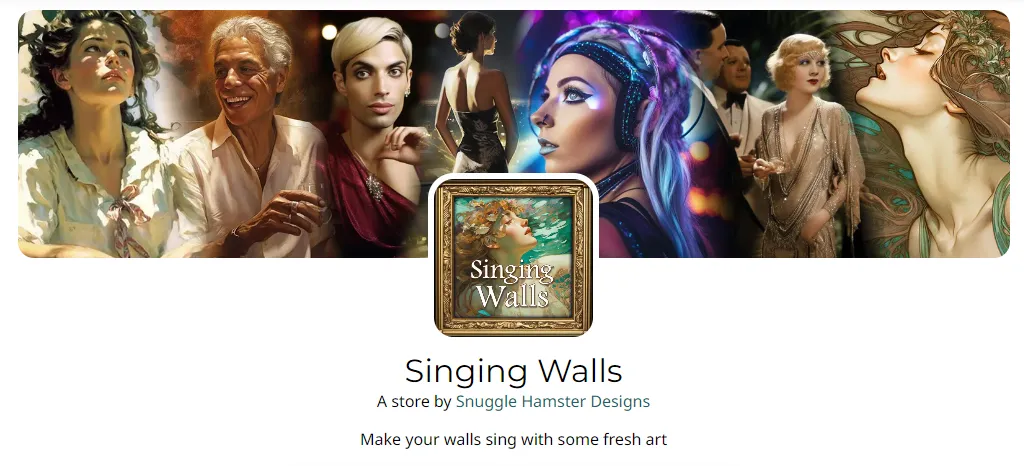
The main/thumbnail image should be a 1000 x 1000 pixel square with your main logo. The banner is a 1:4 ratio big splashy image. Here's how the first two images typically play together on your store's public home page:
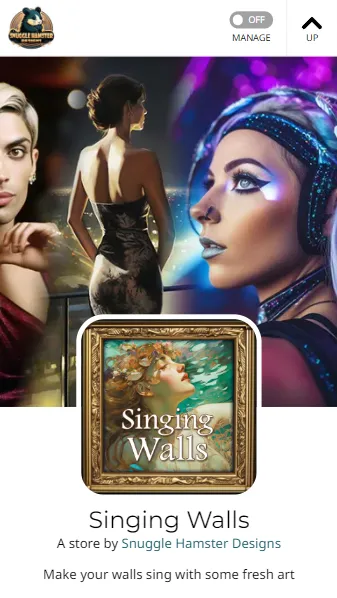
That third "Mobile banner" image is for people visiting on their mobile devices:
If you don't provide a mobile banner version then the site will just use your Desktop banner version and chop it down to a square to fit.
Mopping up
You're done with the basics. Try switching to the Products tab and kicking off an import.